Showing posts with label cooking. Show all posts

1/18/2012

Making Homemade Gyoza

I think I've beaten to death on this blog how much Wifey and I love gyoza, the Japanese version of what Americans more commonly know as Chinese pot stickers and typically stuffed with a mixture of meat and vegetables. At just about every Japanese restaurant we go to it's a must-order for an appetizer.

Since we don't go out for Japanese all the time but do want to eat these more often, we decided to try our hands at making these at home. It's a decent chunk of time, but not really all that difficult. We also cheated just a little bit and bought the wrappers from our local Japanese food store (Uwajimaya for those of you in the Northwest), which saves quite a bit of the hard part.

First you have to make the filling. There are plenty of recipes out on the net, but the one we chose combines ground pork, shredded cabbage, ginger, garlic, pepper, salt, soy sauce, sake, sesame oil, and chopped nira. (There are tons of recipes out there to make all sorts of flavors, but the garlic and pepper to this one was our own interpretation.) You mix all of that together in a bowl and let it marinate, preferably overnight.


I'm sure most people have no idea what nira is, and that's because you won't find it in your grocery store (probably). If you can't, a substitution of scallions will work. So what is it? It's a relative of a chive and translates roughly as garlic chive. Here's what the bunch we bought looks like:


We took some of the leftovers and added it to some turkey stock we made and it adds a nice punch of extra flavor.

After the overnight marination, we laid out wrappers on a flat surface. Then we whisked up an egg and wiped the mixture around the edges of the wrappers, so it would stick together nicely when closed. Into the middle of each wrapper goes roughly a tablespoon of the meat mixture.


Then fold the wrapper over so it looks like a half moon, sealing and pinching the edges together. We added pinch-ridges (for the lack of a better term) in four or five spots around the sealed edge. These pinches, I believe, help hold the wrapper together when it heats in the frying pan.


After quite a bit of manual labor, you get a pan full of uncooked gyoza. We made two batches and in neither one did we get nearly as many as we were supposed to, so I guess we did more than a tablespoon. Whoops.


Now it's time for frying. We poured some sesame oil in the electric skillet, heated it, and then placed the gyoza in the pan to cook for two minutes. Then you add half a cup of water and cover them, cooking for another five minutes.


After the five minutes, remove the cover and let them cook until all the water is evaporated. At this point we flipped them over.


Most recipes don't call for turning the gyoza over and frying both sides, but we did it anyway for half of them because we like the crunch.


And then, when all is done, you have a plateful of tasty looking morsels!


The gyoza can be frozen either cooked or uncooked. We did it uncooked so we can have the nice, fresh crunch when we get them out.

I like eating them just as is after frying, but traditionally they are dipped in a sauce made up of soy sauce, rice vinegar, sesame oil and optionally crushed chile pepper or dry mustard if you want a kick.

Super tasty, fairly easy, a little time consuming...but you will absolutely impress your friends!

1/14/2012

Making Mochi at Home

Making mochi is not the easiest thing in the world. One would think that with just three ingredients it can't be that bad, but you would be wrong. It's one of the more labor intensive items - hard labor - to come out of our kitchen.

What is it? Mochi is a Japanese dish created from glutenous rice, usually sweetened but not always, pounded into shape, and can be filled with just about anything you desire. Traditionally mochi are made to celebrate the new year and are filled with an - a sweetened red bean paste.

On New Year's Eve Wifey's mom came over and supervised our creating of mochi because, well, we have no idea what we are doing. Here's the basic recipe we used:
1 box of Mochiko 
2 3/4 cups of water 
3 cups of sugar
The first item is this, mochiko - sweet rice flour, and can be found at any Japanese food store (we shop at Uwajimaya in Portland). The above is a little misleading because you need either more mochiko or cornstarch (or powdered sugar, we've read but not tried) for dusting the finished product, plus whatever you are going to use for filling.


You are also going to need some rather unique items, such as these:


These can also be found at a Japanese store and are the Japanese versions of a mortar and pestle. The bowl, called a suribachi, has many thin ridges on the inside in varying directions, which is key for the later steps of pounding the mochi. The stick is, well, for pounding.

You will also need a steamer of some sort and a cheesecloth.

First you mix the box of Mochiko and the sugar together. Add water and mix slowly, until you have a smooth mixture. You may not need all the water the recipe suggests, but knowing exactly how much is a fine line we haven't mastered yet. Wifey's mom was skeptical when we put it all in, saying it was too much, and she ended up being right. I have no idea how to determine what is too much.

After the steamer is ready, put the cheesecloth in it and pour the mochiko/sugar/water mixture in, making sure to keep it all inside the cloth. Cover the steamer and let it do it's magic for 20 minutes or so, until the mixture thickens and becomes more clear rather than milky. It should still be malleable and not completely hold it's shape.


Then you pour the mixture into the special bowl and the fun part begins. At the beginning this will be a little lumpy and the point of pounding the mixture is to smooth everything out. Pound away. Don't stop until the mixture loses any lumpiness and starts to take on an almost glue-like texture.


This may take awhile. Switch hands or switch people, as necessary. Did I mention this is not a one person job? Also, don't get this stuff on your clothes. It's not just "like" glue; I'm pretty sure it has alternative uses.


See this below? It's the an, a paste of red beans (azuki), sugar and salt. There are recipes for this, but it's also sold as a finished product at Japanese food stores. No matter what size you buy it will be way, way too much for a batch of mochi.


After the beating of the mochi, we poured the whole thing out on our marble pastry board we dusted with additional mochiko. For this batch, this was the point we realized there was too much moisture because it was super, super, super sticky. Here you should be able to rip off a chunk (it's still hot, just a warning) and form a nice ball, but ours was simply a sticky mess. We had to use way too much extra mochiko and then wait for it to cool a bit, which isn't ideal.


The general flow is you take a chunk of the mixture, roll it into a ball so the edges are smooth, make a dent in the middle and put in about a tablespoon of an, and then wrap it all up, sealing the edges. Then you get this:


See the one closest to the camera on the left? That was one I did. Don't make them look like that. Instead, they should look like the one to the right of that, which Wifey's mom did. That's the difference between an amateur and a pro.

Mochi food porn shot:


We were making these for the family New Year's celebration, so they got fancy cupcake wrappers.


Gratuitous finished mochi pic:


Super yummy. I'm not even a big fan of an, but once a year, in mochi, it's just the right thing to do.

Remember above how I mentioned all kind of things could be done to the mochi? Well, on the mochiko box is a recipe for Cocoa Mochi - no way were we going to let that go unmade. Plus, it's done in the microwave so it doesn't take very long at all.

Plus, we had some pretty damn good cocoa powder in the cupboard to use. Mmm, Valrhona...


Here is the chocolatey goodness that got whisked with the mochiko.


After microwaving everything together, we poured it into a Pyrex dish with parchment paper on top and bottom so we could easily get it out when it cooled for cutting.


It actually turned out very nicely. It had the normal soft consistency of mochi and a pleasant amount of chocolate flavor; noticeable, but not too much. Unfortunately that's the last picture I have because we were in a hurry when it came to cutting it and heading out to the family function. We kept some extra and set it aside, but notice the part in the recipe at the end where it says "store in airtight container and refrigerate"?

You should definitely do that. We didn't and we got some white spots on our leftover cocoa mochi, so we threw them out before taking another pic (sad face here). Trust me when I say it was really good, much easier to make than the other recipe, and you should try it.

Oh, and if you see this at the store, buy it:


Seriously, just do it. The Kona coffee one (you heard that right) is outstanding and I also really like the strawberry and vanilla. The ice cream inside the mochi is pretty dang good - good flavor, creamy - and one of these little guys is a nice little snack. At only 100 calories (I was surprised too) you won't have to spend too much extra time in the gym either.

So is homemade mochi worth it? I think it is. You can buy it in the stores, but it's honestly just not as good as fresh from your own kitchen. Even if it is a crapload of work.

12/21/2011

Cookie, Cake AND Pie!

There is a blog I follow written by a Seattle artist who goes by the name of CakeSpy. Some of you may be familiar with it, but if you are not I urge you to check it out. She has fun with baking, trying all sorts of things I think would be interesting to have a bite of but usually wouldn't be willing to try myself.

Until now.

Everyone loves pie, right? And chocolate chip cookies? And who doesn't love a good cake? Well, what if you COMBINED THEM ALL INTO ONE MONUMENTAL DISH OF AWESOMENESS?! That would be good, right? You'd be interested?

Well then, let me introduce you to Cookie Cake Pie. No, I'm not kidding, and yes, it's exactly what you think it might be.


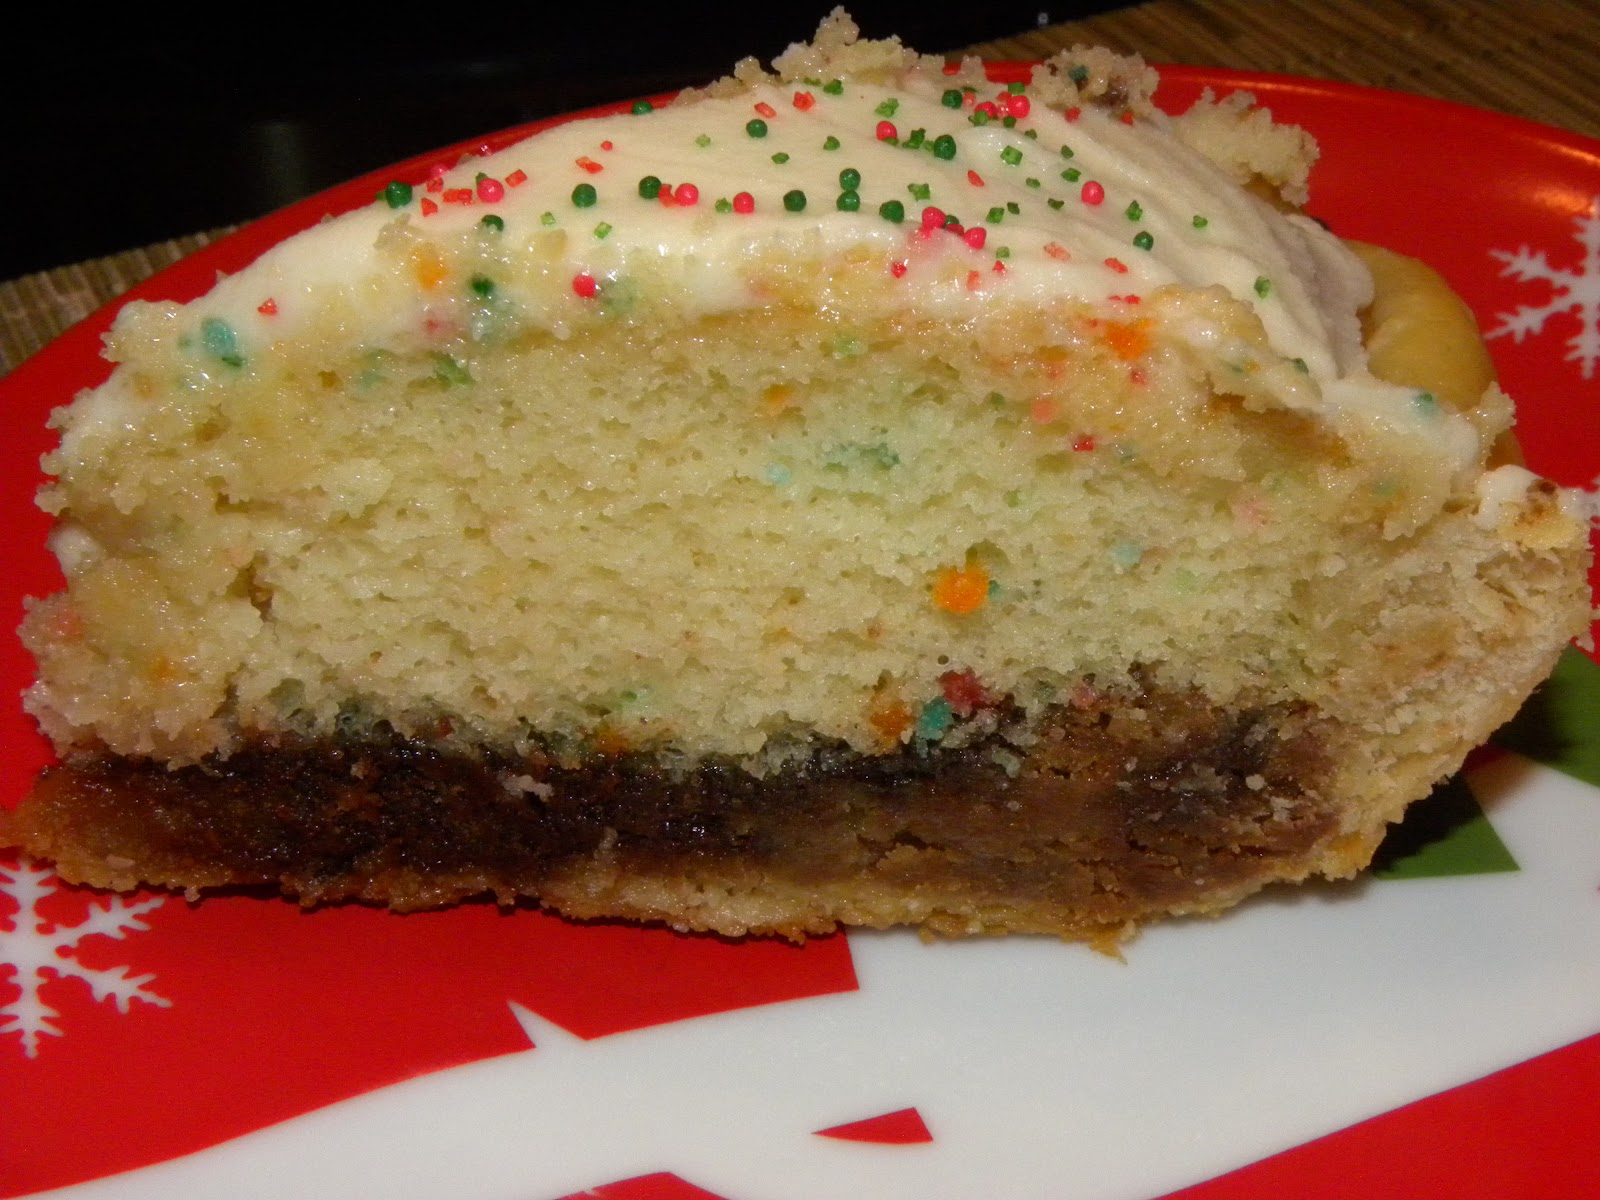
And the thing is, it's insanely easy to make. Ideally you make all the components on your own, but you don't have to and it will still be pretty dang tasty. We had one last frozen, 8-inch pie crust I bought at Immortal Pie and Larder's going out of business sale, plus we also had frozen homemade cookie dough balls (this is our favorite recipe, a Jacque Torres adaptation) and frozen homemade buttercream frosting. All I needed to do was buy a Betty Crocker rainbow chip cake mix and we were in business. The picture above is the finished product.


And with frosting.

I would like to point out that Wifey made this and surprised me when I came home from work one day. I love her so much. :)

Also, she differed from CakeSpy's recipe just a tad. The original recipe calls for putting the pie crust, cookie dough, and cake mix together and baking it at the same time, but if you look at the pictures the finished product seems exceedingly gooey (and I like gooey). Instead Wifey pre-baked the crust (about 12 minutes on 425 degrees), then added the cookie dough and baked it for another 20 minutes (at 350 degrees), then added the cake mix for a final 30 minutes (of course, actual times will depend on your oven).

That way when you cut out a slice you can see each of the elements is nicely baked, but not overdone. (By the way, click on the picture below so it fills up your entire computer screen. You're welcome.)


This. Was. Delicious! Yes, it was absolutely super sweet, but that's to be expected. Take a small slice at a time, share with friends who will be in awe of your baking cred, and freeze the rest for another day.

Now what does one do with half a box of cake mix? Make cupcakes of course! But wait, what if you have an odd amount of leftover cookie dough balls too? No worries, CakeSpy has you covered. Of course I mean cookie dough stuffed cupcakes - what else?!

Once again, these are super easy to make. You already have the cookie dough and if you just made the entire cake mix, you have that too. Just fill cupcake pans 2/3 full and drop roughly half the normal amount of dough to make a cookie into the middle of each. It should look like this:


(Those two on the top right didn't get a cookie dough ball - they ended up as boring normal cupcakes.)

Wait, can you not see clearly how it should look? This next picture should help you. (Click it and make it bigger! Impress you coworkers with the deliciousness!)


Cook them normal cupcake time (from the box) and they come out looking like...well, normal cupcakes.


Frost them up and they still look normal.


Then you take a bite or cut them in half - and EXPOSE THE AWESEOMENESS!


These, like the cookie cake pie, were excellent. Seriously, where the hell has this been my entire life?

We've eaten things similar to this from a bakery, but I was amazed at really how easy it was to make. Try it out on your own, you won't be sorry.

Hmm...maybe next time we use a Devil's food recipe...

8/18/2010

Making Borscht

Borscht is like a lot of classic local dishes - there are tons of different tweaks to it, depending on where the recipe you use comes from. It's a peasant staple found anywhere in Eastern Europe, but thought to originate in the Ukraine.

Apparently, those who make this on a regular basis have a lot of spare time on their hands. Either that, or I'm doing it wrong. I can fully appreciate the latter is more likely true.

This is actually the second time we made borscht (if you want the recipe, you can get it here on Epicurious). This time it took a ton longer...two days, to be exact. If you are a very hungry peasant, that might prove to be a problem. At least, I would think so.

The first day we made the stock, which was easy. Basically brown the meat and throw everything in the pot to simmer for hours. While that was going we roasted the beets, then took the time to peel the skin off (if anyone knows of a quick way to do this, I'm all ears - or, in this case, eyes).

This took many hours though, the simmering, then the cooling of the stock and the meat. The recipe then adds this little note about the short ribs, making it seem like an innocuous little tidbit:

"Chill stock until fat solidifies on top, at least 3 hours. Remove meat from bones; cut away excess fat. Shred meat finely."

Seems easy enough, right?

However, we started this at about 10pm, thinking it would take just a few minutes and then we could go to bed. Actually, Wifey started this while I peeled the second round of beets. Twenty minutes later I joined her, and we spent the next hour working on the ribs.

And what did that entail? Painstakingly pulling threads of flesh from bone and fat. Actually, it was kind of disgusting, but at the same time intriguing. I told Wifey I felt like we were doing surgery. It was messy work - our hands all coated in a thick sheen of fat - and at the end of it our three pounds of beef ribs had been reduce to about ten ounces of flesh to put in our borscht. Perhaps, again, there was a better way to do this, a more efficient way - or maybe it's just slow because it's not something we do every day. Either way, I'm not signing up to do it again anytime soon.

That ended the first day of work. We had meat, we had beets, and we had stock. The second day went smoother, but it takes much longer than the recipe lets on. Also, we didn't need to any extra beef stock - we had plenty leftover from the first day's work we didn't need the extra we bought. I suppose now we have some for later...

One final note: the recipe says to season the final version with additional red wine vinegar, salt, and pepper. We both recommend this. Our first meal I didn't add any extra and the borscht was extremely sweet from the beets; additional vinegar (we used cabernet red wine vinegar) gave it another layer of flavor.

Final Product


We opted for creme fraiche instead of sour cream for our dish, but that's a personal preference. It melts into the hot stock pretty quickly, making for a bright pink, creamy liquid.

Overall this was an excellent meal. We liked the previous version we made too, though, and it was much less work for roughly the same results. So would we make this again, knowing how much work it was? Umm...probably not. At least, not anytime soon.

Borscht, though, is excellent. This was one of those dishes I approached as not really sure if I would like it or not - especially the first time - and I was pleasantly surprised. It's not difficult to make, it just takes time and patience, so give it a try.

8/05/2010

A New Member of the Family

We here at the blog love homemade ice cream. Heck, to be honest, we just love ice cream - it's just better when it's made at home with super high quality ingredients.

I remember making ice cream as a kid - with rock salt and a hand crank mixer. It blew. Maybe the ice cream was good - I really don't remember - but it sure wasn't worth the time standing there turning a crank for some ungodly amount of time.

We had an electric ice cream maker at one time, a very inexpensive one, and it did okay - until about the third or fourth time when it decided turning was just too much work. For the past year or so we had talked about getting a decent one, so when Williams-Sonoma dropped an email in the inbox saying if we bought the stainless steel version from Cuisinart they'd give us a $25 gift card, well, we splurged.

So here it is, the newest member of the MyNWX home kitchen:


So, we had the machine, now what? We picked the vanilla bean ice cream recipe out of the booklet that came in the box. Last Saturday at the Beaverton Farmer's Market we picked up some whole milk and heavy cream from Lady Lane Farms, where we buy milk every week, and some pasteruized eggs from Uwajimaya, and picked up a vanilla bean at New Seasons.

Now, the key note out of all of that is the vanilla bean - they are not created equal. If you have never tasted beans from the major types - generally referred to by their locales, Madagascar, Tahiti, and Mexico - together, you really should. It's a fantastic experience. Our favorite is Madagascar and that's just about all we buy - and almost always it's from Nielsen-Massey.

Unfortunately New Seasons didn't have bulk vanilla beans and doesn't carry the N-M beans, so I picked out another brand. It didn't register the jar didn't say where it was from, but as soon as we cracked it open to removed the seeds for the custard it was quite obvious it was from Tahiti. Oh well (not really a big fan of the Tahitian vanilla). We were making ice cream dammit - now! It's interesting to note the company that sold this bean doesn't even say where it's from on their website.

Undeterred, we mixed all the ingredients together (we did use Madgascar vanilla extract per the recipe) and got our custard going. After everything was mixed together in the pan and heating, it looked like this:


It should be noted here we didn't actually make ice cream - we made frozen custard. According to some site we looked at that I don't recall - maybe it was Wikipedia, they are never wrong - 95% of the "ice cream" homemade in the U.S. is actually frozen custard. I think it has to do with the amount of egg yolks used in the mixture. I think. (Note from Wikipedia: "In the United States the FDA requires it to contain at least 10% milkfat and 1.4% egg yolk solids. If it has less egg yolk solids, it is considered ice cream.")

Fine by us - if you have read the blog you know we love the stuff, at Tart in Portland, Sheridan's in Vancouver, and Old School Frozen Custard in Seattle.

So after getting the mixture properly heated and mixed, then comes the hard part - you have to wait for it to cool thoroughly and chill it in the refrigerator. We are not all that patient. This process was started at about 5pm and we wanted ice cream that night. By the time we got it in the fridge it was after 8pm (after letting it cool on the counter a bit).

We checked it at 9. Still warm.

We checked again at 10. Still not quite.

We checked it at 10:45. Needed a few more minutes.

Finally, about 11:30, we called it good and poured the mixture into the ice cream maker, turning it on. This process takes about 25-30 minutes.

Now, if you buy one of these, take note: It's freakin' loud! Seriously, you can't hear yourself think. If you want fresh ice cream for a dinner party, I recommend having the party outside while the ice cream maker runs. You couldn't hear the T.V., the music, yourself think - it was that loud. Some of the reviews of the machine knocked it down because of that, but if you expect it ahead of time it's probably not a big deal.

Thirty minutes later....VOILA!


Does that not look like amazing goodness or what?!

The consistency was amazing. So creamy, so smooth - so damn good. Really, the only thing that held it back in our minds was the Tahitian bean. And even that, given everything else, didn't stop this from being amazing.

The finished product:


Cuisinart ice cream maker - A

Homemade vanilla bean frozen custard - A

Tahitian vanilla beans - C

It was so good, we may never go out for ice cream or buy it at the store again. (Yeah right, who am I kidding?)

I should note this was not exactly cost effective. The single vanilla bean cost $10 (though the Nielsen-Massey one gives you two beans for $9). The organic, cage-free eggs were probably $2 worth. The local cream and whole milk was about another $10.

But making your own ice cream? Priceless!

Next time we'll use the Madagascar beans we have already boughten and put in the cupboard. Can't wait!

4/27/2010

Okonomiyaki: Making Japanese Street Food

When Wifey first made me okonomiyaki I had no idea what to think. I remember an exchange student my family hosted when I was in high school attempted to make this for us, and it wasn't very good at all. Maybe it's because she didn't get the right ingredients, or maybe she wasn't a good cook, but it didn't translate for us all that well. I mean, cabbage pancakes? Really?

So I wasn't sure what to expect when Wifey made it the first time, so many years ago (you know, cause I'm super old and all). However, hers were very different from what our exchange student made. For one thing they had pork, which is never bad. They also had the necessary sauce - okonomiyaki sauce if you are curious, and I have no idea what's in it, similar to tonkatsu sauce with elements of soy sauce and sweet, but in a very finite ratio. And it was outstanding! Mostly because Wifey is an awesome cook, but also because it was more styled like actual Japanese street food. Our poor exchange student was limited to the typical American pantry and grocery store when she made it, so doubtlessly she had to make some changes and it didn't turn out right. Not her fault.

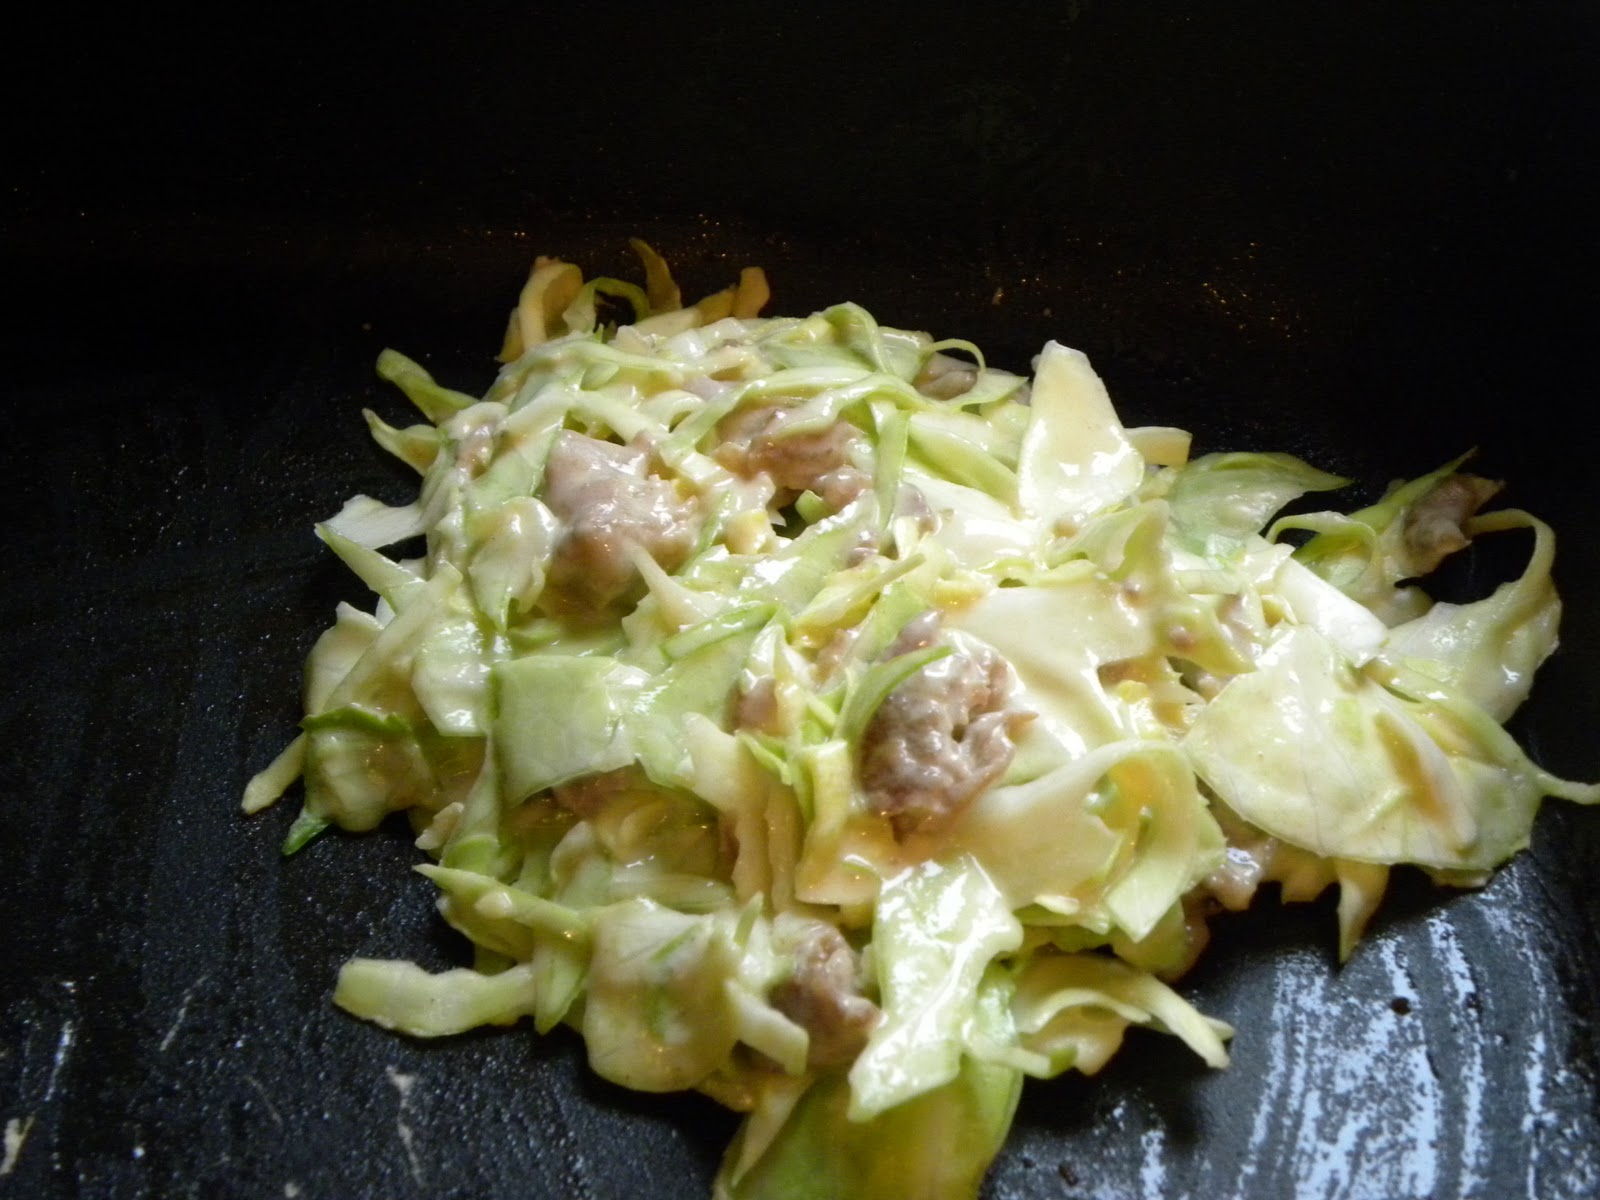
Probably over half of my three readers are now wondering just what the hell I'm talking about. Cabbage pancakes? Sort of - okonomiyaki is a mixture of shredded cabbage, shredded meat, a specific flour, egg, and water. Very simple, and very yummy - and you can add whatever you want to it - more on that later.

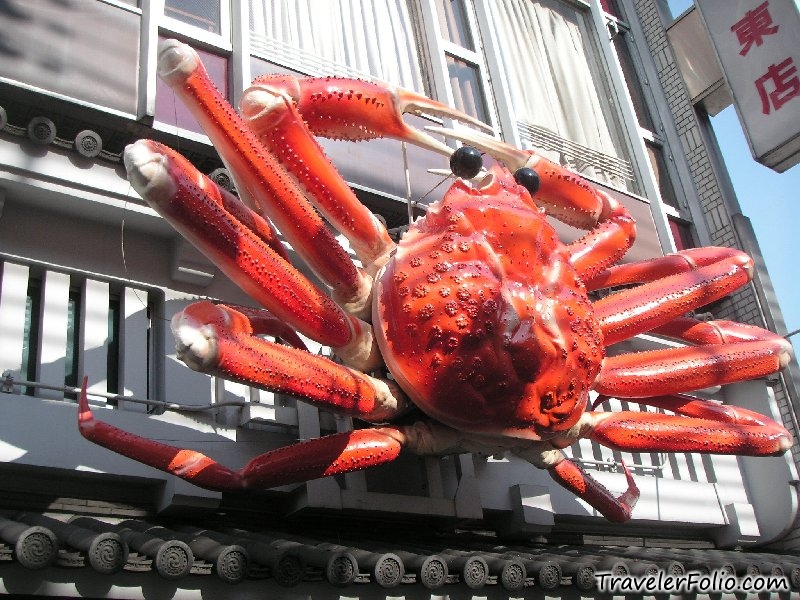
We went to Japan a few years back, visiting some family and seeing some sights, and one of the things we really wanted to do was get some Japanese street food, namely things like okonomiyaki and ramen. Want to know the trouble with that? Well, in Japan these items are not exactly considered the nation's shining beacons of culinary excellence, so your host is apt to steer you in another direction. Which isn't bad, because everything was outstanding, but it's still not what we wanted. And when you are at the mercy of others driving because your Japanese is passable at best and you have no idea where to go anyway, you go where the car goes. Again, it was awesome, but we wanted some of the basic stuff in addition to the crab overload meal (and yes, crab overload was one of the greatest meals ever).

We ended up getting ramen at a place outside of a shrine in Nara if I remember right. It was good to us Americans - better than anything here - but it was also outside a tourist spot, so was it really good? I'm not sure.

Okonomiyaki, now, we got the good stuff. Every city has their own take on it, but the style we had was on a trip to Hiroshima. Wifey's uncle found a third floor area in a mall (I think, maybe it was an office building?) that was literally nothing but places doing okonomiyaki. There were well over 20 vendors, all with big grills ready to cook up all sorts of different specialty okonomiyakis as your heart desired.

I have no idea why I have no pictures - I guess that means we have to go back (oh darn).

We went to a specific place - not sure how her uncle picked that particular  one out - but then proceeded to have one of our best meals in Japan. It was also the most entertaining, because making okonomiyaki in that setting is partly about the show and presentation as well - and that part's free.

Hiroshima-style okonomiyaki also includes egg and yakisoba noodles, which we thought was fantastic, so now that's how we make it at home. It's also really easy to make, though it will require a trip to your local Asian food market (Uwajimaya or something similar) - if you've never been that's an afternoon of free entertainment and exploration for you as well.

Want to learn how to make it? Here you go.

What you will need:

Head of cabbage
Thin sliced pork
Yakisoba noodles
Water
Eggs
Okonomi sauce
Okonomi mix
Mayo
Oil

Notice none of these have amounts - that's because it depends on how much you want to make. The instructions on your mix (baking aisle, I think, in Uwajimaya - the sauce is by the tonkatsu/yakisoba sauces) will probably be in Japanese, but the basic mixture has these ratios:

100 grams of mix (and mix is made from a starch, Japanese potato or yam I believe, along with other necessary ingredients I have no idea what they are)
100 milliliters of water
1 egg
250 grams of shredded cabbage (food processor rocks here)
1/4 pound of thinly sliced pork (this is my rough estimate, adjust up or down as you see fit on this one), cooked

And that's it. Mix up the flour and water, mix in the cabbage and meat, and then mix in the beaten egg. This will make about five five-inch pancakes (or so, that's a rough estimate). We usually double it, because leftovers kick ass.

It should look something like this (camera work is not my forte - I'm a better cook than photographer, but I'm working on it):

 
The Mix

Then heat up your cooking surface. I use an electric skillet for the cooking area, but you could use a griddle or frying pan. Having sides is nice for me since I cook the pork in here first, and then follow the cakes with noodles and eggs. Cook them for about three minutes a side on 300 degrees, or until they have a light brownness to them.

In the Pan


After the Flip

Next comes the noodles. Again, the amount you cook really depends on how much you want to eat and/or save. I toss roughly half of a one-pound package into the skillet with a little sesame oil, which adds a nice flavor. Just fry them up until they are a little crisp, but not burned.

Pile of Noodles

Then crack in the eggs (after taking out the noodles, unless you want scrambled). There should be leftover oil from the noodles, so no need to add any more. Salt and pepper would be a personal preference, I don't use it. As far as done-ness, I like my eggs to be soft enough to leak yolk all over my noodles when my fork cuts in; it's basically the same as any other fried egg you cook.


Hey, It's A Fried Egg

Next you just layer it out onto a plate. First the noodles:


Then the egg:


And finally the actualy okonomiyaki, topped with a light layer of mayo (I know, it sounds weird, but it's yummy), and then a nice criss-crossing of the okonomi sauce. At this point I'm usually done, but you can add pretty much whatever topping sounds good. Dried shrimp, dried seaweed, pickled ginger - whatever your palette desires.

And voila, the final dish!

Top View


Money Shot

Tell me that doesn't make you hungry?! Every time I make it not only do I eat too much, but I'm instantly transplanted back to that simple yet amazing meal in Hiroshima.

Thank me later; now go run to Uwajimaya and make it for yourself, then come back and tell me how easy it was and how damn yummy it was. Impress your friends - chances are most of them will have no idea what you made them, but they will like it. And want the recipe. Email them this link.

1/06/2010

The Christmas Dinner Experience

This year for Christmas Wifey and I hosted a small gathering of seven total family members, including ourselves. I think this may have been the first Christmas we had hosted, and it was definitely the first Christmas where we did significant cooking. In fact, we decided what the hell - we'll do it all! No one has to cook! Or maybe it was me deciding that would be no problem - that's a little fuzzy.

Predictably, everyone thought that was a fantastic idea. Even us, at first.

So we (actually, mainly Wifey) scoured the Net for recipes and put together a menu, of which we will share the 2009 My Northwest Experience Christmas Dinner Extravaganza with you here - replete with recipes!

First we had to decide on the main course. We like to be different so the traditional turkey and ham ideas were out. So what to do instead... Wait, I know! How about turducken!

For those of you that don't know, turducken is a de-boned chicken inside a de-boned duck inside a de-boned turkey, and then wrapped all up and tied shut, so it's literally a giant poultry roast. Usually turduckens have layers of stuffing in between the different meats, but ours did not. Some also have the wings and legs of the turkey left on (in addition to the skin), but ours didn't - it was a nice round roast, almost like a pork loin. If you are curious, it was 13 pounds and $55 - we bought it locally at Ponderosa Meats (a place I have mentioned before we visit often for meat) where the butcher puts it together himself (I think).

Cooking the turducken was easy. We simply put it in a V-roasting pan, scattered some veggies and olive oil in the bottom, covered with foil, then cooked it for 3.5 hours. Then we uncovered it and roasted it for another 1.5 hours, until it was 165 degrees inside. The roasting actually was done on Christmas Eve; on Christmas Day we put gravy made from the turducken drippings in the bottom of a pan and roasted the sliced roast for another 1.5 hours. Here is the result:


Fresh From the Oven


After Getting the Slice


A Closer Look - the chicken layer is clear in the middle


Don't get me started on the gravy. We made something like 10 things in two days, spending about 20 hours in the kitchen, and gravy was the hardest thing to make. Believe it or not, we weren't expecting that (though after sharing this comment with others, they smile and nod knowingly).

The most common question I get was how did it taste? Well, um, it tasted like...turkey. The chicken gets overpowered by the other two birds, and while the duck part is a little moister and a bit fattier, generally the whole thing tastes like turkey. I think if there had been the layers of stuffing the different meats would have been more pronounced. When we do this again - and we will - I think we'll order one online from a place in the heart of crazy turducken territory: New Orleans. Then we can see if it's different.

All in all we were very pleased with it.

Now, whenever you cook bird for a meal you have to have stuffing, right? We decided to do something a little different and found this recipe for Bacon, Onion and Rye Bread stuffing. Neither of us eat rye bread on its own, but when it's in something (and has bacon!) or with a strong meat and cheese on a sandwich, it's a good complimentary flavor.

Our rye was just a fresh loaf from the New Seasons bakery and putting this together was a cinch (no pictures of this one, because it was done just before dinner and it was really crazy at the time). The flavors were excellent - everything worked together. In fact, I might make this just for fun it was so good.

Always at a holiday meal you need potatoes, right kids? Again, we wanted to step outside the box a tad, so we opted for this Herbed Potato Gratin with Roasted Garlic and Manchego. We roasted the garlic heads first, which filled the kitchen with that wonderful roasting garlic smell (hey, give me a break, it's the Italian blood - I love that smell!) and the rest of putting this together was fairly easy. We were not able to find the San Simon cheese (not exactly sure what it is) but did get a nice aged Manchego (from Spain, of course) and a smoked Gouda from Whole Foods.

One key to making this a successful dish I will point is be very careful with how you stack the sliced potatoes. If you are like me and like to be fast, it won't turn out as well because the potatoes end up stacked too tightly, then they don't cook evenly. Place them in the dish one slice at a time, making sure it's even. Yes, it takes longer, but it's worth it. Here is how it turned out:


Fresh From the Oven


We actually put the whole dish together the day before, then all we had to do was bake it on Christmas Day. I grew up not being an au gratin fan, but it turns out cheese and garlic makes everything better.

Of course, you also need vegetables. Depending on your point of view the potatoes may take care of that - maybe, maybe not. We opted for this Creamy Spinach with Smoked Gouda. It's basically boiled spinach mixed with a fantastically rich Smoked Gouda Bechamel sauce, then topped with bread crumbs and broiled. Does that sound easy to make? Good, because it was. And it was fantastic.

Again, no pics, because this was the absolutely last thing we did before serving dinner. I'm not sure weaving in all that bechamel into the spinach leaves it still qualifying as a vegetable dish, but it was damn good.

We also served a baguette from Little T American Baker with some extra roasted garlic and a creamy cheese (the name of which escapes me), plus the standard appetizer faire of carrots, celery, pineapple, and sliced Florida oranges (from Harvey's Groves and fantastic).


Never Can Have Too Much Garlic

Of course all of this food needs a little something to wash it down with, so we served a pinot noir from Ponzi Vineyards, which is very close by. We were going to go with white because we thought white went with poultry, but Food and Wine Magazine (you know, where we got all the recipes) convinced us otherwise. Did it work? Not entirely sure, but it is one of the few pinot noirs I've actually liked, for whatever that's worth.

We also made eggnog - real, homemade eggnog. I'd never had this stuff until this year, just whatever was in the grocery store. I liked that - Wifey doesn't - but we had no idea what we were missing. I read an article about making eggnog in Mix Magazine and then we tried it at Coffeehouse Northwest, where they had a warm one for the holidays. That was amazing and the tastes are absolutely nothing like the grocery store offerings, so I decided I want to make it.

After digging through a bunch of recipes I settled on this one by the Food Network's Alton Brown. I didn't want one that was super heavy on the liquor - some called for as much as 8 ounces just of alcohol! - because I like the nogginess (my blog, my words). This one seemed like a nice balance - and it turned out amazing.

The first time we made it (I think we are up to fivetimes now) we followed the recipe to the letter. I bought a bottle of Maker's Mark bourbon and we did the egg whites at the end. It was still a little strong, and why became obvious when I noticed the Maker's Mark is 90 proof, not 80. Oh well. I also used a little too much of the fresh nutmeg.

The egg whites whipped in at the end made the whole thing a little lumpy and I don't think they added anything to the flavor. The second time we made it without alcohol, no egg whites, and no nutmeg - thinking we could add nutmeg and alcohol to each individual glass. Online it mentioned homemade eggnog is best with dark rum, so we made another liquor store run and came back with a bottle of Myer's Dark Rum.

This one was much more smooth without the egg whites and adding the liquor into each glass worked well - we taste tested with the Meyer's, the Maker's Mark, Bacardi golden rum, Jim Beam bourbon, and Rogue's Hazelnut rum. (And yes, the taste test that brought us to that conclusion was a lot of fun - thanks for asking!) As recommended, our favorite was the dark rum, so good call internet. The drawback was not using the nutmeg in the cooking process - it left the nog missing something.

The third time we cooked with the nutmeg, again leaving the liquor out for individual glasses and completely disregarded the egg whites (I guess those are good for eating anyway, all healthy and the like since I'm drinking tons of whole fat eggnog). This was perfect.


Homemade Eggnog - It's Awesome!


It's also fairly easy - just takes a little time - and fun. I mean, taste testing with an array of liquor is always fun, right?

Now it's time for desert. Noticing we hadn't really had fruit involved in the meal yet, we opted for this Poached Pear and Brown Butter Tart. We had never poached anything, so that was something new.

As it turns out, poaching fruit is amazing. The combination used in this recipe - cloves, vanilla (we used paste), Riesling, sage, cinnamon stick, and sugar - made the entire house just smell heavenly. We also poached an extra pear just to eat by itself, which was a revelation on its own. In fact, if we had had room in the fridge I would have saved this liquid to drink later - it was that good.

Here is the final product:


Heavenly!


The grated orange is what really made the dish, in my mind. The crust cooked well and the pears - with all their poached flavors - were really drawn out by the orange. The tart wasn't overly sweet, wasn't overly fruity, and just had a perfect amount of balance. This recipe is a definite keeper.

But you can't have desert without chocolate, right? Of course not, that's why we made Salted Fudge Brownies as well. These were a snap to put together and the Maldon sea salt really added a perfect compliment to the thick chocolate.

We also did these Chocolate Mint Thumbprint Cookies, which were very good. We used Andes for the mint chocolate, and I think a Ghirardelli chocolate bar for the bittersweet chocolate. We also made Zebra brownies (regular brownies - recipe from King Arthur flour - swirled with a sweetened cream cheese mixture - here from Pillsbury).


Plate of Goodies


Close Up of the Goodies


I think everyone liked it - I know we did. I also made the joke that people should be checking their diets at the door for this meal. I have no idea how many calories it was, but I know we went through quite a bit of eggs, heavy whipping cream, whole milk, and cheese. And in my mind, those are all very, very good things.

Would I do it all again? Honestly, I'm not sure - it was a hell of a lot of work, a lot of standing on the feet in the kitchen. We have a hardwood floor - apparently we need to get the rubberized floors to cushion the feet a bit more. I think it was fun having full control over the menu, but next time might be a little more potluck-y. Maybe sometime in the future we'll forget how much work it was and offer to do it all again. Maybe.