1/29/2012

Brunch at Brasserie Montmartre

When we came across the Brasserie Montmartre in downtown Portland, the menu alone was enough to convince us this was a place we needed to try when the timing worked out. We wanted to try brunch first, which they only serve on Sundays, and we typically stay home on Sundays. With all sorts of French-American classics and the promise of high quality results, today was the day we checked it out.

Located on SW Park Avenue next door to the Westin hotel, the restaurant is open and welcoming, with tables on the sidewalk should you so choose. A very large bar runs the depth of the long and narrow space, which opens up in the back around a staircase down to more tables, the open space well-lit with an enormous chandelier.

Despite the fact it was late morning on a Sunday the restaurant was less than a quarter full (hmm...) and we were seated promptly. After taking our orders the waitress brought us a croissant, our choice between plain or chocolate. This was not a difficult decisions; of course we both chose chocolate. The flavors of it were good, but the pastry itself wasn't flaky at all and was instead moist. We both liked it, but it's not a good example of a croissant.

I ordered the eggs Benedict, which came on a biscuit with pork belly, some avocado, and a side of roasted potatoes. (The pictures today are all taken with the iPhone 4S, using a flashlight app. I think we need to practice with that a bit more to avoid the shadows.)


This dish was pretty good. The pork belly was nicely cooked with a bit of a crunch, a welcome and unexpected element to the dish. The Hollandaise was tasty and the eggs cooked perfectly - not too runny, but still soft. They could have used a tiny bit more seasoning, tasting a little too much of, well, water (I realize they are poached in water, but it stills seems like something was missing). The potatoes were seasoned and crisped nicely.

Wifey ordered a special, a buttermilk fried chicken sandwich on a biscuit with tomato bacon jam and butter lettuce. With that came an order of pomme frites (thin French fries) and a side of garlic aioli.


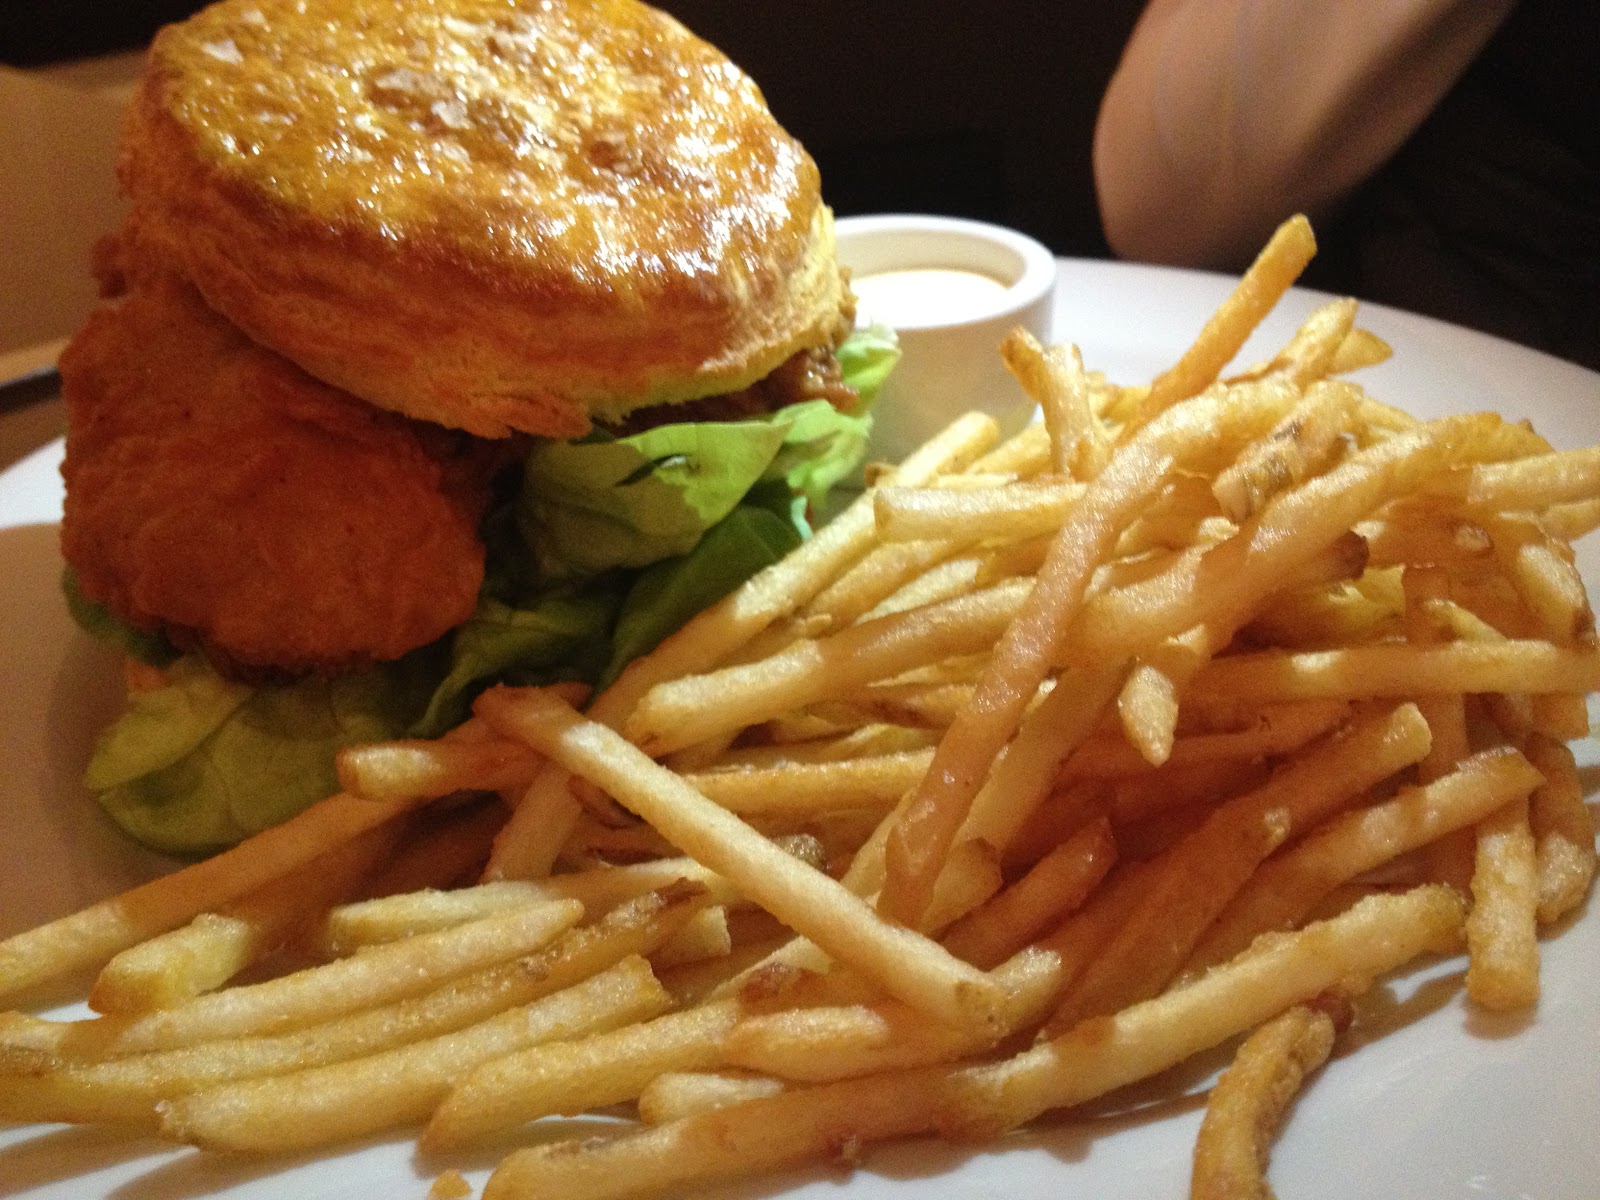
The fries were excellent, cooked to a good crunch without being overdone, as was the aioli (garlicky, but we like that). The sandwich was, well, just okay. The biscuit seemed a little dry and also the wrong choice to use as bread and the lettuce was soggy. The tomato bacon jam added some flavor, but none of that flavor was bacon. The chicken seemed to be nicely done, but they claim to use only breast meat for their sandwiches and this was definitely brown meat. Uh oh...

Mini Rant: Why is restaurants don't say on the menu if they use a specific cut of chicken? And even if they do, why is it sometimes that's not what we get? This happened at Irving Street Kitchen the last time we went to, where we were told something was going to be breast meat and it was not. Is whether or not a piece of chicken is breast meat subject to interpretation? I thought it was pretty clear. I mean, if they menu says one thing or if the wait staff is told to tell customers a dish is made with breast meat, how can it possibly be made a different way? Is the chef in the kitchen making changes on the fly and hoping no one will notice or complain? And no, we don't complain...usually. Sometimes we do. Mostly we just use it as a checkmark against returning to a particular restaurant.

Overall the meal was just okay. Parts of it were oustanding, such as the fries, and some of it just makes me shrug. The staff was very friendly, which is always a plus if the food isn't great. Despite not being blown away with goodness I think we will give Brasserie Montmartre another chance, perhaps for a regular lunch or a dinner.

At least we know we won't have to worry about getting a table...

1/26/2012

Misaki Now Tolerates EzyDog

About two and a half months ago, in our infinite wisdom, we bought Misaki an EzyDog QuickFit harness because we thought it would be easier on her neck and shoulders for walks.

She hated it.

She refused to walk in it so we had no choice but to go back to a regular collar. At this point she probably figured she had won and us weak humans would give up.

We did not.

Instead we spent another $30 and bought her the Chest Plate version of the EzyDog harness, also in pink camouflage. The idea was the points of contact on her would be different, allowing her more freedom of motion at the shoulder. We also decided to go a little slower this time and allow her to get used to it, rather than throwing it on her and taking her immediately outside.

She still didn't look very thrilled. (These first couple pics are from the first day, so if the harness looks too loose, it is.)


We put it on and gave her a few treats, enticing her to walk around the living room for a few minutes, moving from treat to treat. After a couple minutes, we took it off and praised her.


We did this every day for a week or so and she gradually warmed up to it. At the beginning of a session she'd move a little awkwardly, but then decided it was okay. Well, okay enough.


Then we decided she was ready for a real walk. Mother Nature proceeded to dump 10+ inches of rain and snow on Portland over the course of two weeks and Misaki never left the house (if I didn't have to go to work, I wouldn't have either).

But today, FINALLY, it was both light out and dry when I came home from work, so Wifey harnessed and treated Misaki and we took her outside.


She still doesn't love it, but she managed to walk in it with no issues. We took her to the local park and back, our normal basic walk. We left her Lupine Martingale collar on just in case, which was good because the harness still needs a little tightening. Overall, though, she managed to walk and sniff whatever she needed to.


She even was willing to pose for a picture with her momma.


Success! We hope, at least. Apparently the QuickFit was just not for her, but then again should I be surprised? She's very particular.

And Misaki, I'm sorry, but this picture was too cute not to share:


Our poor puppy...she puts up with so much. I may want to sleep with one eye open tonight...

1/18/2012

Making Homemade Gyoza

I think I've beaten to death on this blog how much Wifey and I love gyoza, the Japanese version of what Americans more commonly know as Chinese pot stickers and typically stuffed with a mixture of meat and vegetables. At just about every Japanese restaurant we go to it's a must-order for an appetizer.

Since we don't go out for Japanese all the time but do want to eat these more often, we decided to try our hands at making these at home. It's a decent chunk of time, but not really all that difficult. We also cheated just a little bit and bought the wrappers from our local Japanese food store (Uwajimaya for those of you in the Northwest), which saves quite a bit of the hard part.

First you have to make the filling. There are plenty of recipes out on the net, but the one we chose combines ground pork, shredded cabbage, ginger, garlic, pepper, salt, soy sauce, sake, sesame oil, and chopped nira. (There are tons of recipes out there to make all sorts of flavors, but the garlic and pepper to this one was our own interpretation.) You mix all of that together in a bowl and let it marinate, preferably overnight.


I'm sure most people have no idea what nira is, and that's because you won't find it in your grocery store (probably). If you can't, a substitution of scallions will work. So what is it? It's a relative of a chive and translates roughly as garlic chive. Here's what the bunch we bought looks like:


We took some of the leftovers and added it to some turkey stock we made and it adds a nice punch of extra flavor.

After the overnight marination, we laid out wrappers on a flat surface. Then we whisked up an egg and wiped the mixture around the edges of the wrappers, so it would stick together nicely when closed. Into the middle of each wrapper goes roughly a tablespoon of the meat mixture.


Then fold the wrapper over so it looks like a half moon, sealing and pinching the edges together. We added pinch-ridges (for the lack of a better term) in four or five spots around the sealed edge. These pinches, I believe, help hold the wrapper together when it heats in the frying pan.


After quite a bit of manual labor, you get a pan full of uncooked gyoza. We made two batches and in neither one did we get nearly as many as we were supposed to, so I guess we did more than a tablespoon. Whoops.


Now it's time for frying. We poured some sesame oil in the electric skillet, heated it, and then placed the gyoza in the pan to cook for two minutes. Then you add half a cup of water and cover them, cooking for another five minutes.


After the five minutes, remove the cover and let them cook until all the water is evaporated. At this point we flipped them over.


Most recipes don't call for turning the gyoza over and frying both sides, but we did it anyway for half of them because we like the crunch.


And then, when all is done, you have a plateful of tasty looking morsels!


The gyoza can be frozen either cooked or uncooked. We did it uncooked so we can have the nice, fresh crunch when we get them out.

I like eating them just as is after frying, but traditionally they are dipped in a sauce made up of soy sauce, rice vinegar, sesame oil and optionally crushed chile pepper or dry mustard if you want a kick.

Super tasty, fairly easy, a little time consuming...but you will absolutely impress your friends!

1/16/2012

Merry (Belated) Shibamas!

This is a little late, being Christmas-themed and all, but it's full of cute Shiba pictures so I bet I get a pass.

Last year a group of the Shibas with Twitter (Twibas, if you will) personas got together and did a gift exchange. Misaki was a little sad we didn't sign her up for it, so when it came time for the 2011 Secret Shiba Gift Exchange, she made sure we put her name in.

Secret Shiba is an honest to goodness real thing, with it's own tumblr site and everything. It's organized by the human mother of Phineas the Shiba, who is famous in his own right after winning awards for a short film this past summer (see it here!).

There were guidelines and I believe something like 60 Shibas signed up for the 2011 version. The pups were from not only all over the United States, but also Australia, Canada, and even Luxembourg! Misaki was assigned Baron (shibamindtrick on Twitter) and she gave us very specific shopping instructions. We were to get things she liked and approved of, so into the package went some Zuke's Z-Bones, a Himalayan chew, and a stuffed goose that honks when the pup chomps it. Plus she advised us to get a little something for Baron's parents, so we found some chocolates from Xocolatl de David.


She also made sure when it came time to wrap the gifts that she approved of the paper.


And she even gave the card a kiss of approval (if you click on the pic below to make it bigger, you can see the nose prints).


My genius self pre-paid for the flat rate box at the post office, so instead of putting a sticker on it with the shipping price, they sold me a pile of stamps. That in itself took five minutes to stick all those things on.


We made sure to get it in the mail with plenty of time before Christmas and a few days later got confirmation on Twitter it had arrived.

Then, a couple days later, a box arrived for Misaki!


She wanted to open it. And, actually, so did the cats. This is Misaki being annoyed...she takes out her agression on a chew toy.


Fine, she said, can you at least put it under the tree for me? Um...sorry Misaki, but we haven't put up a tree in a couple years. This is the best we could do.


She was not amused, and she became convinced Wifey's OSU Beaver reindeer was part of her gift. Every day she wanted to open that box. She'd lay in the living room and give us the saddest, most forlorn puppy dog eyes ever.


When Christmas morning came she was excited, but when she realized Wifey and I were just going to sleep in and take our time making coffee and breakfast, she got sad again. (This cartoon from The Oatmeal about how different age groups celebrate Christmas is so true. We so fall into the category of 30-somethings without kids.)


Finally I opened the box up for her.


Her box came from Nami, who can be found on Twitter here and also on tumblr. Misaki wanted to have everything at once.


That pink Princess Nylabone really got her attention. She has been known to destroy one of these in a month, but apparently Nylabone changed the formula on them. Up until now all of them had been mint flavored, but now they also have a bacon flavor. She was ready to chew this right out of the cardboard packaging.


She also received a sock monkey toy that squeaks, which she has been carrying all over the house.


And there was this neat little container of bacon and mint treats. She loves them!


All in all the Secret Shiba Exchange seemed to go very well. The toy was a hit.


The treats were met with approval.


And probably unknowingly, Nami also sent the kitties toys as well. They love tissue paper like crazy.


Lots of good times. Thank you to Nami and her pack for the gifts, a Merry Christmas to Baron and his pack, and a hearty thank you to Phin and his pack for organizing the whole thing.

And none of this would have been possible without Twitter. Technology really is amazing, isn't it?

1/15/2012

Well Crafted Brunch at Ned Ludd

Ned Ludd, a restaurant in northeast Portland calling itself an "American Craft Kitchen," has been on our list of restaurants to try for quite a while. Each time we came close to choosing it, though, something else looked just a little bit more interesting. Part of that is because it's really difficult to nail down just what kind of restaurant it is. They are big on local and sustainable ingredients and there are influences of many different cuisines in their menus.

This past Saturday we decided to try it out; many pictures of dishes from the restaurant looking fantastic convinced us it was time to go. Here are a couple pictures of the menu and it help to illustrate why Ned Ludd is so hard to categorize (click the pic for a larger version).


Located on NE Martin Luther King Boulevard in a tin shed of a building set back from the street, the restaurant doesn't exactly announce itself. The name over the door blends in with the restaurant's colors. There is a courtyard out front with picnic tables and various plantings, making it seem like a pleasant place for a summer dinner outside (which sounds like a reason in itself to go back). The inside of Ned Ludd is small, seating maybe 40 diners or so, with some tables and some bar seating. The kitchen is open and dominated by a brick oven which keeps the place toasty warm.

On a Saturday morning around 10:30 there was only one other couple there when we arrived, but it started to fill up the closer it got towards noon. The decor is eclectic, a mixture of rustic country with rich curtains giving it a very welcoming feel, as if the chef was inviting you into his home. Large windows let in copious amounts of light.

We decided to start off with two smaller plates from the "bits" section. The first was the deck crisped muffin with honey and butter for $6.


Served on a wooden cutting board, one well loved in a good way, what it looks like is a quartered muffin that has been burnt, but it didn't taste that way at all. It was crisp, as promised, but it was very, very moist inside with a variety of sweet and savory flavors, including some apple, cloves and cinnamon. The cup in the picture is filled with warm honey and the butter flecked with large flakes of salt. The muffin didn't even need he accompaniments, but they definitely didn't hurt. We've never eaten a six-dollar muffin before, but this was fantastic.

Next up was the pork rilletes with mustard and volkhorn brot (that's the bread) for $9. It also came with some slices of pickled apple.


The rillette was smooth, rich, flavorful, and easily spread on the bread. The jar is topped with a layer of fat, which our waitress explained is the traditional way to store a rillette. See the crosshatch design in the top? That's an example of the attention to detail you find at Ned Ludd. It has to be a challenge to top something with a quarter-inch layer of fat and have it look appetizing, but they did it. This was fantastic. The mustard wasn't too hot and worked well with the bread and the pork. The apple also was a nice palate cleanser, though I don't feel it was necessary.

Wifey's main course was the "bird in a nest" over meat ragu for $13. The nest is a polenta cake, with a circle carved out and replaced with an egg.


There's the egg.


Simply put, this was amazing. The polenta cake by itself had plenty of flavors, not just corn, and had a nice crunch. The egg was cooked perfectly. And that ragu? Oh my - melt-in-your-mouth goodness. I don't know how long that had been reducing in the brick oven, but it's totally worth the time.

I went with the "hangtown bake" of eggs, leeks, bacon, mushrooms and oysters served with toast for $14.


Again, all of the flavors perfectly complemented each other. I don't even like mushrooms, but these were tasty and added a level of umami to the dish that was just right. The oyster pieces melted in your mouth and the bacon chunks added a rich, salty profile. These eggs were also done just right.

That's quite a bit of well prepared food that added up to a spendy brunch. While the cost was more than I would typically prefer to spend for brunch, I can't say any of this was overpriced. Considering the attention to detail and exceedingly high quality of the meal, I can only compliment Ned Ludd on a job well done. The service was good also. I will absolutely recommend Ned Ludd to others and can't wait to go back for dinner. Maybe in the summer we can and eat outside, with Misaki curled up at our feet.

1/14/2012

Making Mochi at Home

Making mochi is not the easiest thing in the world. One would think that with just three ingredients it can't be that bad, but you would be wrong. It's one of the more labor intensive items - hard labor - to come out of our kitchen.

What is it? Mochi is a Japanese dish created from glutenous rice, usually sweetened but not always, pounded into shape, and can be filled with just about anything you desire. Traditionally mochi are made to celebrate the new year and are filled with an - a sweetened red bean paste.

On New Year's Eve Wifey's mom came over and supervised our creating of mochi because, well, we have no idea what we are doing. Here's the basic recipe we used:
1 box of Mochiko 
2 3/4 cups of water 
3 cups of sugar
The first item is this, mochiko - sweet rice flour, and can be found at any Japanese food store (we shop at Uwajimaya in Portland). The above is a little misleading because you need either more mochiko or cornstarch (or powdered sugar, we've read but not tried) for dusting the finished product, plus whatever you are going to use for filling.


You are also going to need some rather unique items, such as these:


These can also be found at a Japanese store and are the Japanese versions of a mortar and pestle. The bowl, called a suribachi, has many thin ridges on the inside in varying directions, which is key for the later steps of pounding the mochi. The stick is, well, for pounding.

You will also need a steamer of some sort and a cheesecloth.

First you mix the box of Mochiko and the sugar together. Add water and mix slowly, until you have a smooth mixture. You may not need all the water the recipe suggests, but knowing exactly how much is a fine line we haven't mastered yet. Wifey's mom was skeptical when we put it all in, saying it was too much, and she ended up being right. I have no idea how to determine what is too much.

After the steamer is ready, put the cheesecloth in it and pour the mochiko/sugar/water mixture in, making sure to keep it all inside the cloth. Cover the steamer and let it do it's magic for 20 minutes or so, until the mixture thickens and becomes more clear rather than milky. It should still be malleable and not completely hold it's shape.


Then you pour the mixture into the special bowl and the fun part begins. At the beginning this will be a little lumpy and the point of pounding the mixture is to smooth everything out. Pound away. Don't stop until the mixture loses any lumpiness and starts to take on an almost glue-like texture.


This may take awhile. Switch hands or switch people, as necessary. Did I mention this is not a one person job? Also, don't get this stuff on your clothes. It's not just "like" glue; I'm pretty sure it has alternative uses.


See this below? It's the an, a paste of red beans (azuki), sugar and salt. There are recipes for this, but it's also sold as a finished product at Japanese food stores. No matter what size you buy it will be way, way too much for a batch of mochi.


After the beating of the mochi, we poured the whole thing out on our marble pastry board we dusted with additional mochiko. For this batch, this was the point we realized there was too much moisture because it was super, super, super sticky. Here you should be able to rip off a chunk (it's still hot, just a warning) and form a nice ball, but ours was simply a sticky mess. We had to use way too much extra mochiko and then wait for it to cool a bit, which isn't ideal.


The general flow is you take a chunk of the mixture, roll it into a ball so the edges are smooth, make a dent in the middle and put in about a tablespoon of an, and then wrap it all up, sealing the edges. Then you get this:


See the one closest to the camera on the left? That was one I did. Don't make them look like that. Instead, they should look like the one to the right of that, which Wifey's mom did. That's the difference between an amateur and a pro.

Mochi food porn shot:


We were making these for the family New Year's celebration, so they got fancy cupcake wrappers.


Gratuitous finished mochi pic:


Super yummy. I'm not even a big fan of an, but once a year, in mochi, it's just the right thing to do.

Remember above how I mentioned all kind of things could be done to the mochi? Well, on the mochiko box is a recipe for Cocoa Mochi - no way were we going to let that go unmade. Plus, it's done in the microwave so it doesn't take very long at all.

Plus, we had some pretty damn good cocoa powder in the cupboard to use. Mmm, Valrhona...


Here is the chocolatey goodness that got whisked with the mochiko.


After microwaving everything together, we poured it into a Pyrex dish with parchment paper on top and bottom so we could easily get it out when it cooled for cutting.


It actually turned out very nicely. It had the normal soft consistency of mochi and a pleasant amount of chocolate flavor; noticeable, but not too much. Unfortunately that's the last picture I have because we were in a hurry when it came to cutting it and heading out to the family function. We kept some extra and set it aside, but notice the part in the recipe at the end where it says "store in airtight container and refrigerate"?

You should definitely do that. We didn't and we got some white spots on our leftover cocoa mochi, so we threw them out before taking another pic (sad face here). Trust me when I say it was really good, much easier to make than the other recipe, and you should try it.

Oh, and if you see this at the store, buy it:


Seriously, just do it. The Kona coffee one (you heard that right) is outstanding and I also really like the strawberry and vanilla. The ice cream inside the mochi is pretty dang good - good flavor, creamy - and one of these little guys is a nice little snack. At only 100 calories (I was surprised too) you won't have to spend too much extra time in the gym either.

So is homemade mochi worth it? I think it is. You can buy it in the stores, but it's honestly just not as good as fresh from your own kitchen. Even if it is a crapload of work.